Creating a Music Video on a Budget
Creating a Music Video on a Budget
One of the most effective marketing tools a band can have, especially in the digital age, is a good production Music Video. Now, I’m not talking about taping some live gig somewhere in bad light with lousy (or questionable Sound). What I am talking about that MTV style video, you know what I mean, the concept video where the band illustrates a visual journey along with a prerecorded studio quality soundtrack. If you are going to compete in this new Music industry, you have to learn to play the content game. This is an essential part of the game, having great content that will bring your music and image to a new fanbase.
NOTE: The Key to Good Video is “GOOD AUDIO”!
In the past, this type of video required a huge amount of funds, either from Record companies or a backer with some very deep pockets. Making a Music Video was a very expensive project, and it was reserved for only those who could afford it. But just as we have seen, technology has change in the way records are made in the recording industry, with the advent of the some really impressive tools in the home recording market. We also are seeing the same changes happening in the video industry where HD Technology, cameras and software have put some impressive tools in the hands of the grass roots videographers.
Some of the technology has come in the most unlikely forms. The Band Vintage Trouble (www.vintagetrouble.com From the Honda Commercials) created a music video using only IPhone 4’s and with some impressive editing and a standard “Old Film” software filter which would hide the fact it was lower quality video. What was impressive is they were able to create a broadcast quality Music Video using cell phones. (See video Below).
At first look, it seems amazing that you can get a great video using an IPhone 4, but it really comes down to good planning and some very basic concepts. But it doesn’t hurt to have a 3 time Emmy Award winning editor, director Alen Petkovic shoot the video for you, but the bottom line is, this goes to show you that you CAN create a good production music video with the technology that is in your hand right now.
So, let’s take a look at some important concepts you need to shoot a video project.
The JPBlues Band (www.jpblues.com) has decided that they are going to do a production video of the song “Keep on Walking” from their “Make Room at the Table” CD. The Budget was small, it was almost non existent. The videographer chosen to produce the project was Trent Whitmire, a long time friend of the bass player who loves to shoot and edit video. I cannot stress enough how important a person who is familiar with good shooting and editing techniques can be to a video project. Even when the budget is small, sometimes you can find someone who impresses you with their passion and love of what they do, it’s worth the money to hire them rather than trying to struggle through the learning curve. Check out your local colleges and film schools and see if there is anyone who is willing to work for “band money” to add to the video resume. You never know what great up and coming talent you may stumble upon. Then again, you can always hire Trent!
So let’s start out by taking a look at the finished product, and then you can read on and listen to the interview to find out more about how it was created and how you can use these techniques to create your own Music Video.
Pre Production
This is probably one of the single most important steps in creating your video. You need to start out with an idea, lay it out on paper in the form of a storyboard (for a storyboard template CLICK HERE). Use stick figures if you have to, but the important part is to get an idea as to what you want the video to look like, from start to finish. Not that this will be written in stone, but having a good idea on the story you want to tell and how you want to tell it is one of the single most important steps. It is important to note that you have to be realistic and stay within the capabilities of your technology. (You should avoid car chases, leaps from tall buildings and any extensive CGI generated environments or creatures.)
Create a “Shot List”- Once you have your story, you start to identify the kind of shots you are going to need, the types of locations you will need to shoot in and the angles you want to shoot. Organize them in such a way that you have some sort of visual idea laid out that you can refer to later on when you get into the editing the video. (for a Shotlist template CLICK HERE)
IMPORTANT CONCEPT – Pay attention! Here is a very important concept that most amateur videographers don’t take the time to grasp. Rather than just tell you I want you to do an experiment for me. I want you to turn on your TV, put on any TV show, music video, or movie. I really don’t care what you put on, it really doesn’t matter. I want you to start counting when a scene changes and start back at one each time you see the scene change again. Now you have to pay attention, because we are so used to seeing the changing scenes we almost don’t notice them, but do this for a while and you will start to realize this very important concept that will make all the difference when you start to build your shot list and finally when you get into the editing of your video. You rarely if EVER see any one scene on the screen for any more than 5 seconds. When you create your shot list you have take into consideration that you will need an ample amount video to accommodate enough different 3-5 second shots to fill the full length of your video. And those shots should be arranged in such a way that you advance the idea and concept of your video. Nobody said it was easy! But if you master the part of the process, you video will come together easier and quicker, and the final product will look more professional. There is nothing that screams amateur or is more boring, than a static video that stays in one place for a large segment of the video.
LOCATION – You have to be considerate with choosing locations to shoot your video. Don’t assume you can use private property as a location without first getting permission. To Illustrate, During the B-Roll shooting the band and Trent Whitmire decided to take some shots in an open lot that apparently was on private property. The owner came out fairly irate asking them what the hell they were doing on his property. Fortunately when they explained why they were there, the owner gave them permission to use the location. But, not every property owner will be that forgiving, so always ask first if you are going to use any private property.
For the most part choose your locations that will give you the look you want (or a look you can create) using public places. With the JPBlues Shoot the band choose several main locations. The first was downtown Buford Georgia, which had a quaint small town look for JP, Atlanta for a city look for the Drummer Shiloh Bloodworth, A rural location in Athens Georgia for Bassist Tony Hossri and finally a performance location which they used Midnight Circus Studio’s in Buford Georgia (www.mid-nightcircus.com). The on locations shoots were done on a Sunday afternoon so there was little traffic and minimal people walking around the locations.
Bikini Girls and Passers By – Before you can use anybody’s image on film or tape and broadcast it on the internet or TV, you must get a physical release signed by them giving you specific permission to use their likeness in your video. That goes for girlfriends, fans, groupies or the occasional stranger that passes by your camera while you are shooting. By getting a release you can save yourself some grief down the line should someone take offense as to how they are portrayed or how they look on your video or if someone just decides they don’t like you anymore. CLICK HERE for an example copy of a Video Release Form.
NOTE: A good resource for forms and documents for your video shoot is Filmsourcing – production document templates and release forms
Doing the Shoot
Now that you have the shot list in hand, you are ready to shoot your video footage. You should arrange the shot list by location, so you don’t miss any shots that you had planned in your shooting schedule. The shot list gives you an organized list of what kind of shoots you need, what locations you need to find and helps you stay on track and insures you will have what you need when you start editing. This is not to say you should not always be ready for an unexpected opportunity to shoot something you didn’t anticipate. In one scene in the video, JPBlues is seen walking along a Rail Road Track with a freight train passing. This was a spur of the moment opportunity that was grasped by Trent and it added an interesting element to the final product. The planning is a good way to keep things running smoothly, but remember with any creative endeavor, it is a fluid process. Allow that process to bring some interesting new aspects to the project you may not have seen in pre-production.
Keeping it in Sync – Since this IS a music video, it is important to keep the actions of the band and the other participates in the video in Sync with the music. You should have some way to play the prerecorded music track loud enough so everyone that is on camera can hear it, as well as having that music picked up on the video camera’s microphone. This helps later on in the editing process to sync up what is going on in the video with the prerecorded music. The singer will sing along with the prerecorded tracks, if there is a performance section, the musicians will also play along with the track so everything looks right. It is VERY important that if you have a solo section, especially with guitar players, that the musician remembers what he did during that solo and re-enact it as close as possible. When editing it can be a real nightmare if the soloist (or any other musician) does not look like he is playing the right notes(or beats), it may seem trivial during the shoot, but believe me it can kill a really good video in the end, or at the very least make you very unpopular with the video editor.
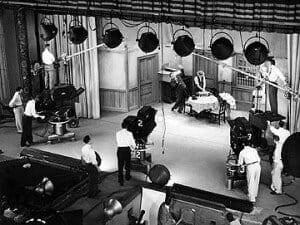
Simulating a Multi Camera Shoot – What gives most professional videos that specific look, is the fact that they are using multiple cameras to capture different angles or aspects of the scene. Sometimes because of cost, manpower, lack of space, etc. having multiple cameras is not an option. That does not mean you cannot get the same look or effect. You just have to use your creativity and common sense.
If you want your video to have a multi camera look, shoot it multiple times!
If you want a multiple camera shoot and you have one camera, well the solution is simple. Shoot it multiple times. With the JPBlues Video, in particular the performance section, the scene was shot 6 times. With each shot the band performed along with the soundtrack pumped through the studio live room monitors. As they performed, Trent shot a different angle during each pass. Once as a wide shot of the whole band, again with the camera concentrated on the individual members and lastly the final two shots were concentrated on close-ups of the guitar and Vocal singing. Again the whole band was performing to the pumped in soundtrack so the background was kept consistent. Now using only one camera, Trent was able to simulate a full 5-6 camera shoot. And when edited together, you cannot tell the difference. The same technique was used on the outside shoots as well, where multiple passes of each person in the band were taken to give lots of aspects, angles and options.
NOTE: The more video you have, the less the chances you will run short in the editing process. Sometimes videographers shoot some seemly unrelated shots to have for the editing process. This is called getting B Roll footage.
Lighting – Lighting can be the one factor that can make or break your video shoot. Outside shoots or inside shoots, you have to at least have a basic knowledge of proper lighting techniques for shooting video. This is a subject that could fill a book but rather than go into a long description Below is a video that does a great job in giving you the basics of video lighting. Do some research and learn more about video lighting. It will be time well spent.
With any lighting setup, do some test shoots first. Look at the tests and determine if this is the look you are going for. This can save you some stress later on when you go to edit. With the JPBlues Video we used some basic stage lights (off camera) and had some standard photography lights which we changed the bulbs to 45 watt and place an amber Gel in front of them so they didn’t completely blow out the iris of the camera. This gave us that stark spotlights in the background look, as well as blacked out everything behind them. You only saw the band that was up lighted (lights from below shooting up) by the stage lights. During each different shoot (see above on Multiple camera shoots) we changed the stage lighting to best work with each version of the shoot.
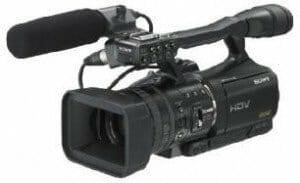
The Camera – With the advent of new camera technology the playing field is becoming more level between consumer and professional level equipment. This is not to say there is not a defined difference, but that difference is becoming harder to see, especially with delivery formats like Youtube and Vimeo on computer screens and mobile devices. If you are going for a Blueray DVD delivery, yes you will see a difference, but for the most part, your band video will be delivered via the internet. The quality of what is available in the consumer market far exceeds the capability of what delivery format can recreate. Even the straight digital cameras that have traditionally been regulated to still pictures have brought high quality HD video into their list of features. The fact that some of these cameras come with some impressive optics and lens options along with other features can make them well suited for shooting great video, make them a good choice. So, the reality is, there is a good chance that you own a really good video recording device somewhere in your home, or in the home of one of your band members.
Don’t forget your smartphone! Many of today’s phones are capable of shooting in 4K with some impressive results. Not only can they shoot the video but there are apps that will allow you to also edit your video as well! Check out the Videos Below!
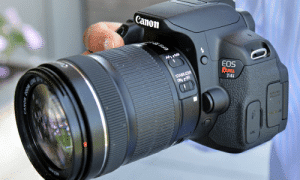
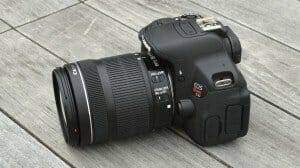
For the JPBlues Shoot, Trent Whitmire used a straight digital camera (Canon Rebel T4i), not a conventional video camera. It is a semi-pro digital still camera with great optics, interchangeable lenses and professional features that give you great control over how the camera treats light. Though this is more expensive then most home cameras, bear in mind, that even some the more inexpensive digital cameras and new video cameras can shoot really good HD video. If you are interested in this particular camera click below and read the specs. If you would like to see some more inexpensive options I have provided some links to other camera options at the end of the article.
Editing
The subject of video editing again could take up volumes to explain in detail. A video editor is an artist in his own right, part technician and part conductor of an orchestra of sight and sound. This is where you video takes it shape and form. This is where your story is either told with grace, intelligence and beauty or falls into oblivion of bad video hell. Don’t underestimate the power of a good editor in making your video come to life. It takes practice and it takes some basic fundamental knowledge to master this fine art form. The first we already gave you in the form of no more than 3-5 seconds of a scene on screen at any given moment before you move onto something else. The next tip is a slippery slope that many Videographer has fallen victim to.
Video editing software has been around for quite a number of years. The one thing I hate about most of the software programs out there is all the useless wipes and transitions that they come with. Yes, I said it, they are useless! It’s like the are daring you to produce really bad video. The simple rule of thumb is; if you can notice the transition, then you are abusing it. If you watch any movie, TV Show, Commercial, Music Video, etc. you will start to realize there are only two types of video transitions that are in use in a professional setting. The Cut and The Fade. If you want someone to get excited use a cut, if you want them to cry, or get emotional, use a fade. It’s that simple!
A CUT is a transition where the video is immediately cut from one scene to another. This is generally used to create excitement and movement in edited program and is most likely the most used transition in any broadcast editing.
A FADE is a transition between scenes where one scene slowly fades out as the next scene fades in, most times over the course of 1-3 seconds. This is a transition that can create an emotional feel, softness to the video. As a rule you would use this to soften the video content, give it more of an emotional feel.
The rest of the transitions that most video editing software comes with should not be used! Unless you are looking to create that bad wedding video look. Don’t take my word for it, always refer to the professionals, and watch and be aware of what is in use and how things are edited for TV, Professional Music Videos, Movies, etc. If you study how these professionals edit, it will help you in the long run in creating a video project that you will be proud of.
Feel the Beat – In a music video it is important to bear in mind that all the video cuts and fades should be made to the beat of the music. Each scene change should be, in someway be in sync with the beat and flow of the music. If the music is high energy rock or dance, like we mentioned above, you would use lots of “Cuts” to illustrate movement, excitement and energy. To enhance that feeling of excitement you would keep your scenes short, 2-3 seconds each, even as low as 1 second or less “Accent” scenes to bring attention to a specific dynamic segment of the music. And again, if you are doing a slow R&B or Love song, you would use Fades moving from scene to scene like a figure skater moves on ice. You would use different lengths of fade to bring certain emotions to the beat of the music. The longer the fade the softer and more emotional the feel gets, the shorter the more energy you put back into the edit. Keeping to the beat of the music is a little trickier using fades but try and hit the beat at the “End” of the “Fade” and you will find this is a great place to start when working with fades.
As you are editing go back to the beginning every few edits and review your video from the beginning. Look to see if it “Feels” right, if something does not look or feel right try and figure out what it is and change it then. Most video editors will tell you, that if something doesn’t look or feel right when you are editing, it is only going to get worse as you move deeper into the project. So make 3 or 4 edits and then review, this is a good work practice to get into. Remember this is where you video comes to life, it takes time and patience, but it’s well worth it in the end.
Here is a video tutorial on editing a Music Video that can give you some base information. The principles apply to any editing software, but it’s good information to get you started on your own project. The software used in this particular video is Final Cut on a Mac. At the bottom of the Article I have some links to software and books to help you with shooting and editing your video.
Today there are editing apps for the Iphone and the Android phones that allow you to create impressive videos using just your phone for shooting and editing!
To see what you can do with minimal tools available the video Below was shot with a simple DSLR Camera and edited on a IPhone 7 App. You can Read about this Video Here!
Showing what you can do with Just an IPHONE 7 The John Pagano Band Shot the Below Video using just an IPhone. They used Adobe Premiere to do the editing and special effects, but remember this was shot completely on a Smartphone with the exception of the drone footage which was done with a GoPro. Read about the Shoot Here!
Here are some cameras options that you can use to shoot HD Video and create your own music videos!
Here are some books that will give you more information on how to create your video and market it online
Discover more from Making A Scene!
Subscribe to get the latest posts sent to your email.
