A Review of the Behringer X-Air Mixers
I have been working sound for the last 30 years or more, both as a Live Sound engineer and in the recording studio. I have had the opportunity to work on a variety of mixing desks over the years. From the large venue installed systems to small touring systems. Some great desks, some not so great, but I have always been able to make it work with what I had.
When it came to a band on the road, usually space and size were more of a consideration than quality or features. Many times it was one of those mixer boxes and a couple of speakers, which would take care of the basics of getting the vocals out and maybe add a little bass drum to the mix. Having effects, eq, compressors, gates, were not in the equation and would be something I would mutter about in frustration as I tried to make this “piece of crap” sound good. Monitors were a luxury and if you did have them it was more set and forget them. My own “road” PA system consists of a 4 JBL Passive Mains and a set of JBL Passive Subs, 2 QSC GX5 power amps, SPX90, Crossover, Mackie 16 Channel Mixer, Roadcase, Snake, Kustom powered Monitors, Etc. As you can see it is more than most touring bands would use, but like I said I have been doing sound for over 30 years and my baseline is a bit higher than most. This rig does takes up more room than I want in the van and I am always looking for a way to scale down the PA and yet still have at the very least the basics I need to produce a good quality sound experience.
So when I saw the features and price of the X-Air Series of Mixer “Stage Boxes” I knew I had to have one. Then all of a sudden like a sign of fate, Musicians Friend up my credit line and before I knew it I had a XR18 (18 channel 12 Buss Version) in my hands. Damn you Musicians Friend!
The Basics
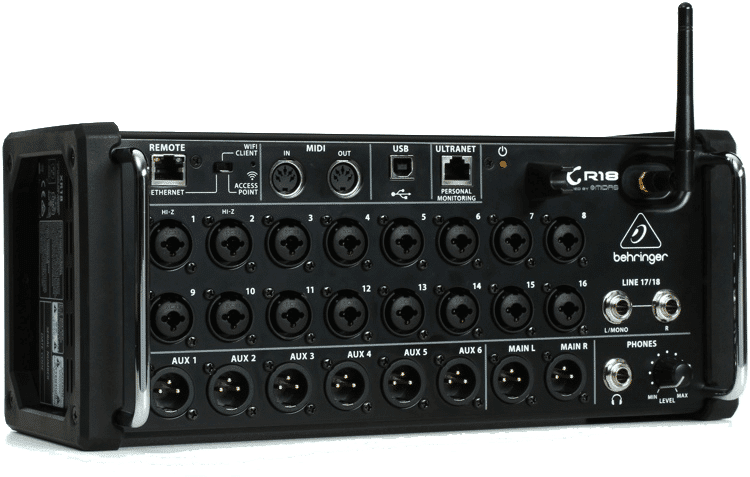
So lets get into the basics of this unit first. When you look at it, you are taken by the fact that it is small and lightweight. The unit itself looks like stage box you would see on any stage, no controls, no knobs or faders. Included in the box is a set of rack ears in case you want to mount the unit in a rack case. On the front of the unit, you have 16 mic inputs are accessed via ‘combi’-type connectors which will take XLR or standard TS or TRS jack plugs (you can connect balanced or unbalanced sources). Which means line-level inputs can be connected direct from your gear and can be plugged straight in. Inputs 1 and 2 also accept signals from instruments such as electric guitars and basses that need to see a high impedance. The 16 XLR inputs connect you to the legendary Midas preamps. In addition input 17 and 18 are Line Level TS/TRS inputs and have limited processing options. There are 8 XLR audio outputs, 6 Aux and 2 Main outs. The Aux’s can be used for monitor mixes, Subs on Aux (sending Just the instruments that you want to the subs instead of the full mix through a crossover), Outboard Effects sends, etc. The Main outs obviously would go to your power speakers or power amp rack/crossover.
There are a few other connections on the face of the unit such as a headphone out (with level control), Cat5 ethernet, Ultranet (to connect to multi channel monitor interfaces), WiFi Switch, MIDI In/Out, USB (for Multi-channel Recording) and a WiFi Antenna.
On the side of the unit you have a power connection and on/off switch. That is pretty much it, that covers pretty much everything that is on the unit itself.
It’s All about the App
As you can see from the picture of the unit itself there are no controls or screens. In order to operate this unit you will have to have one of the many smart devices on the market (IPhone, Andriod Phone, IPad, Andriod Tablet) or an PC or Apple Laptop. All the controls are are accessed through their FREE software for these devices and is available through Google Play, Apple Store or online. You connect to the base unit via it’s built in WIFI(more on this later), which from my experience is very stable and effective.
You can download and install the software without having the unit and run it in “Offline” mode to check out all the features. This was a pretty big factor in my purchase decision, as I was able to play with the software on both my laptop and on my tablet to get familiar with how the mixer operates.
Behringer has a full series of videos available to walk you through the operation of the software for the X air mixers
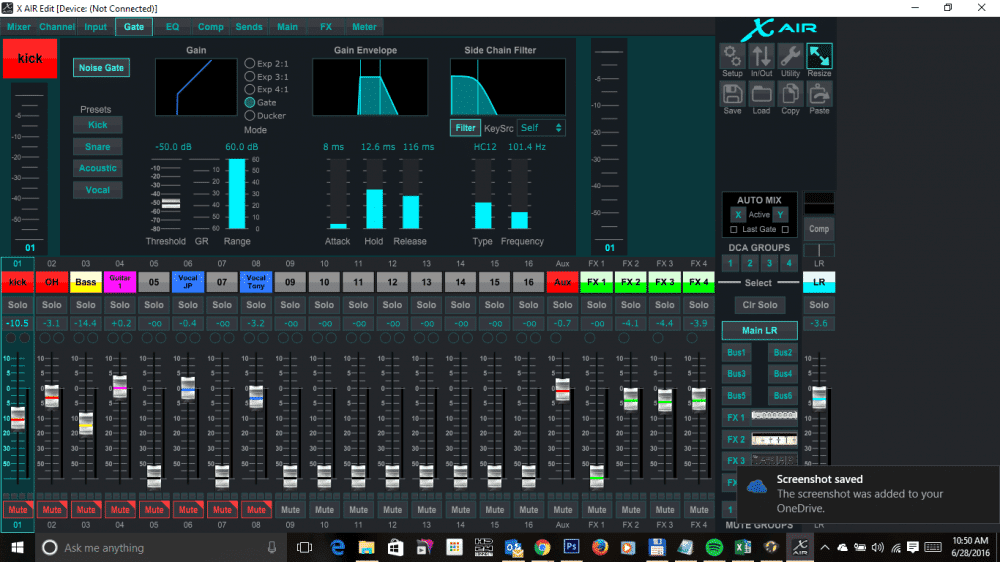
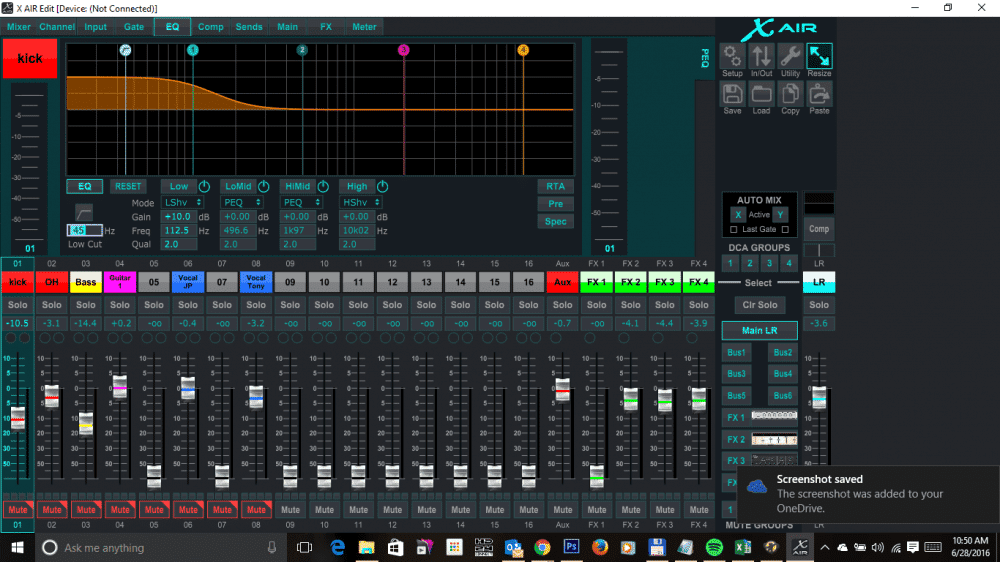
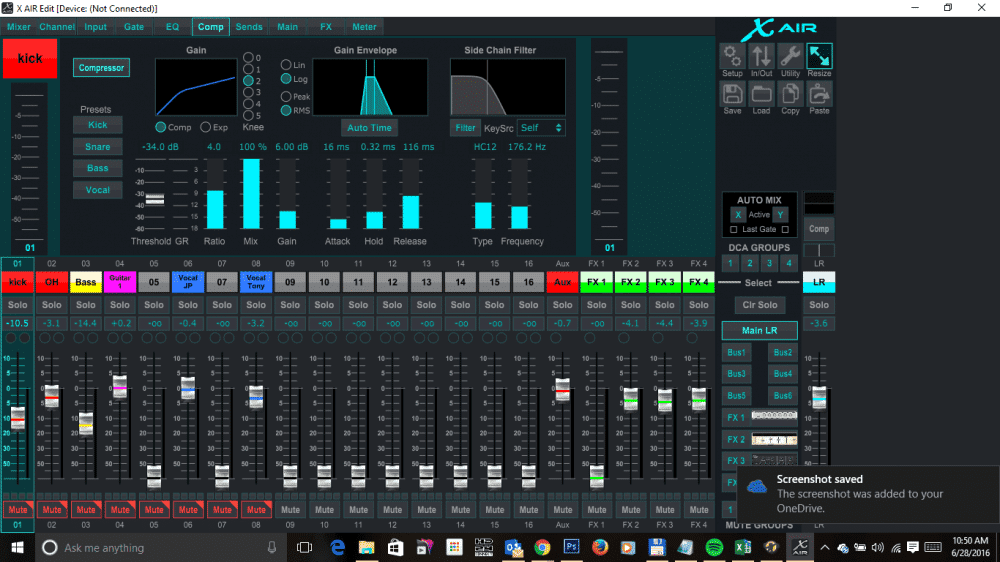
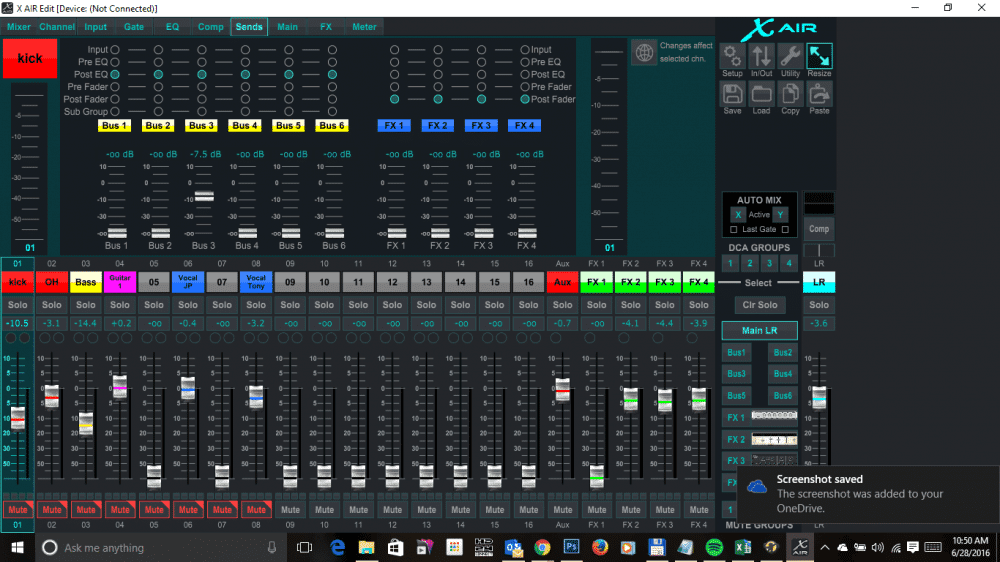
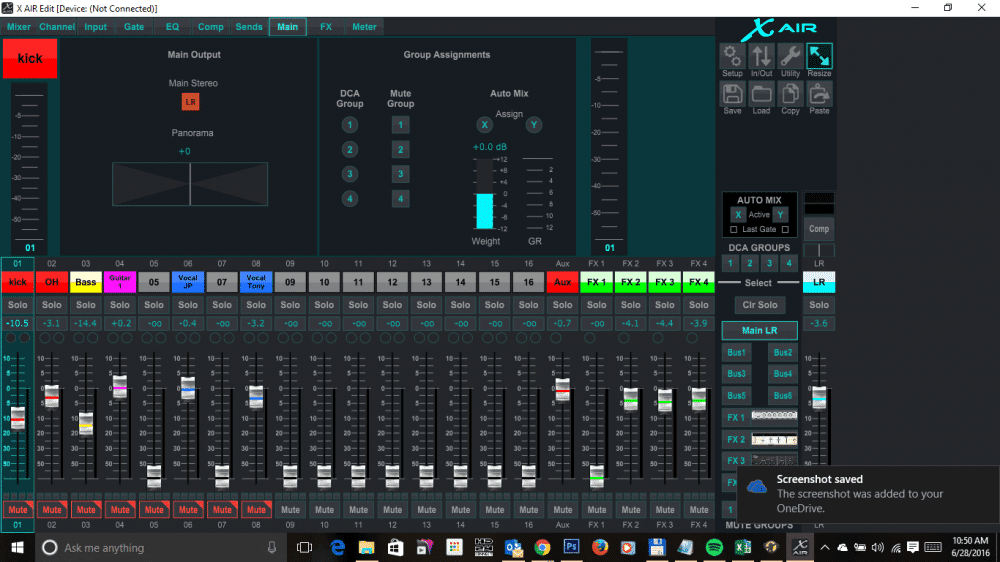
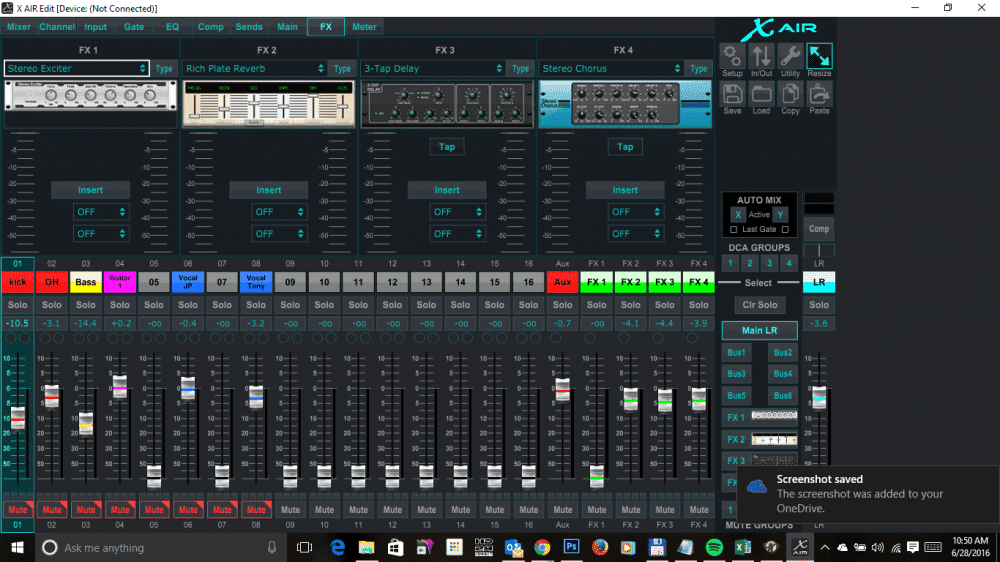
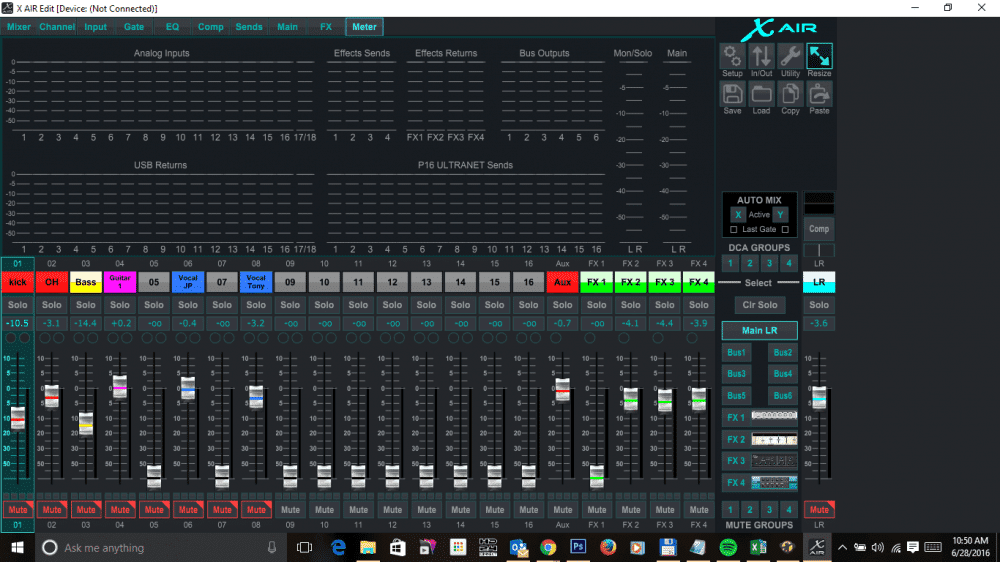
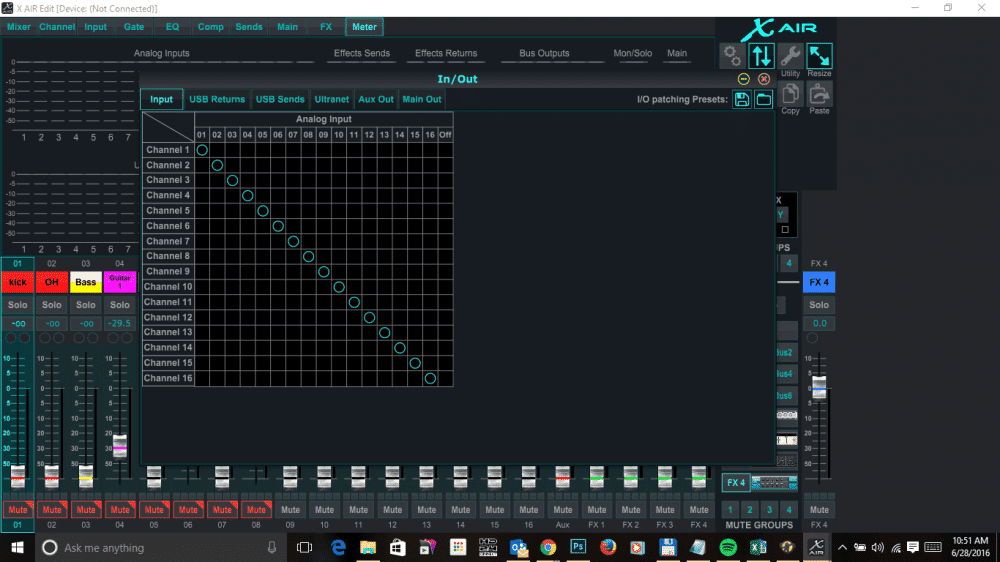
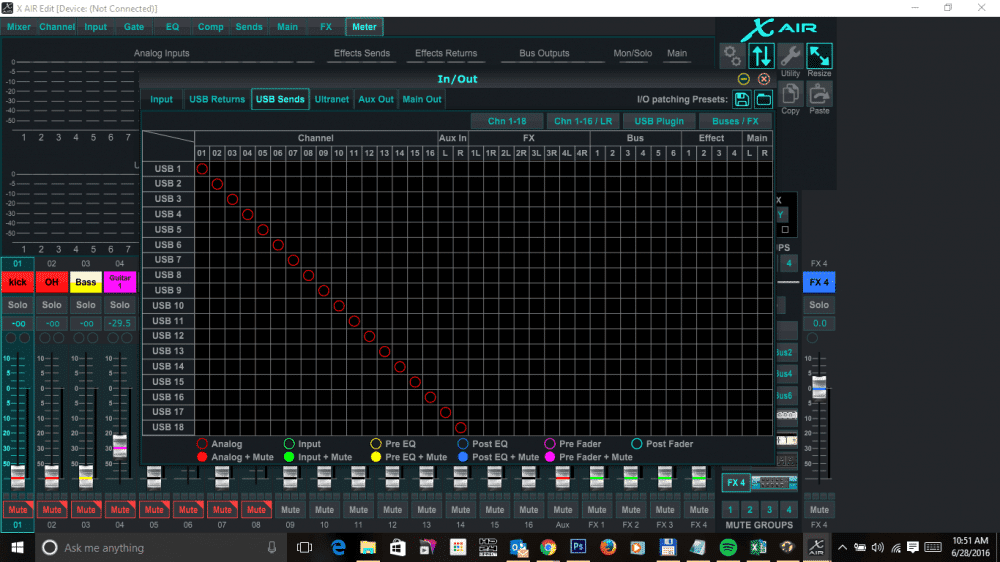
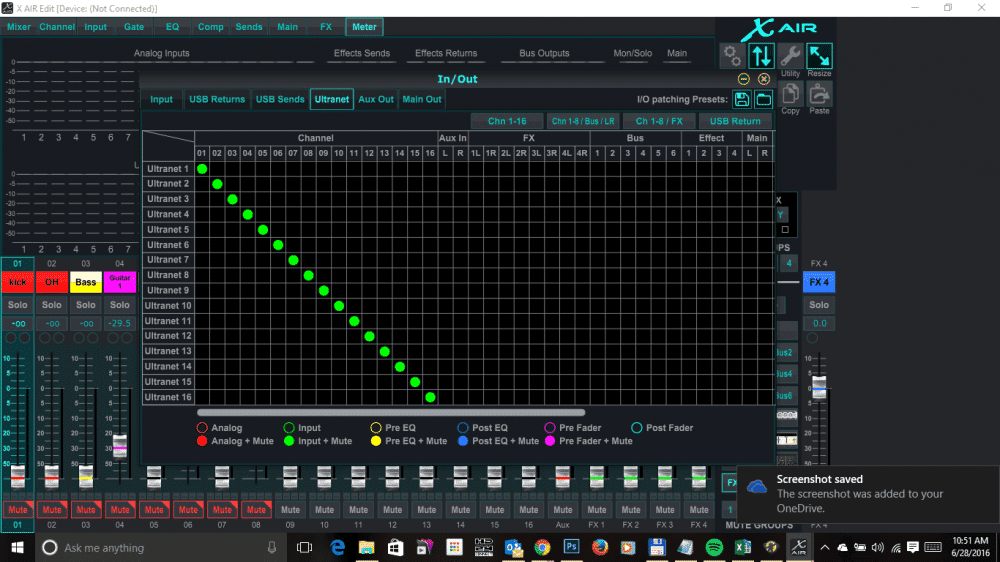
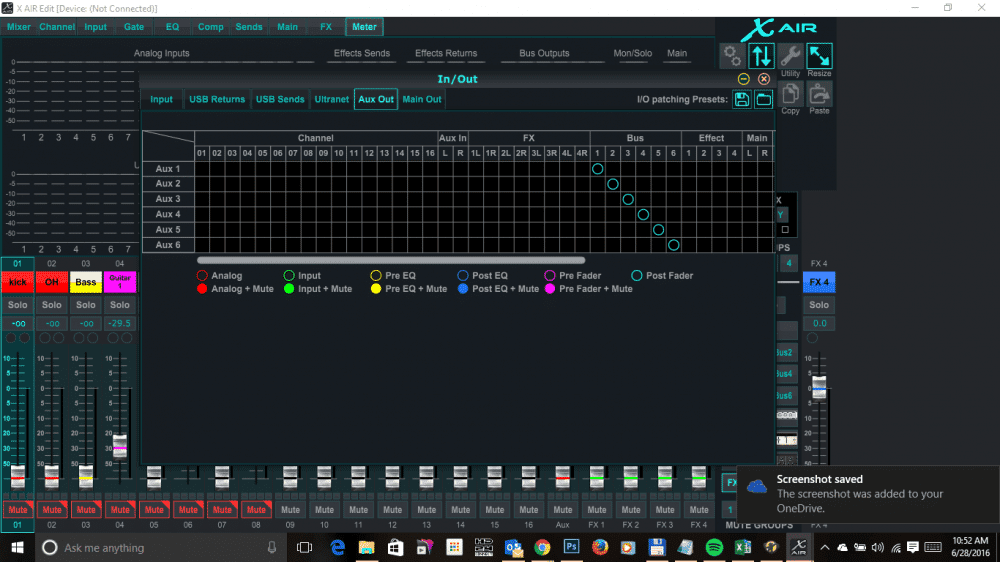
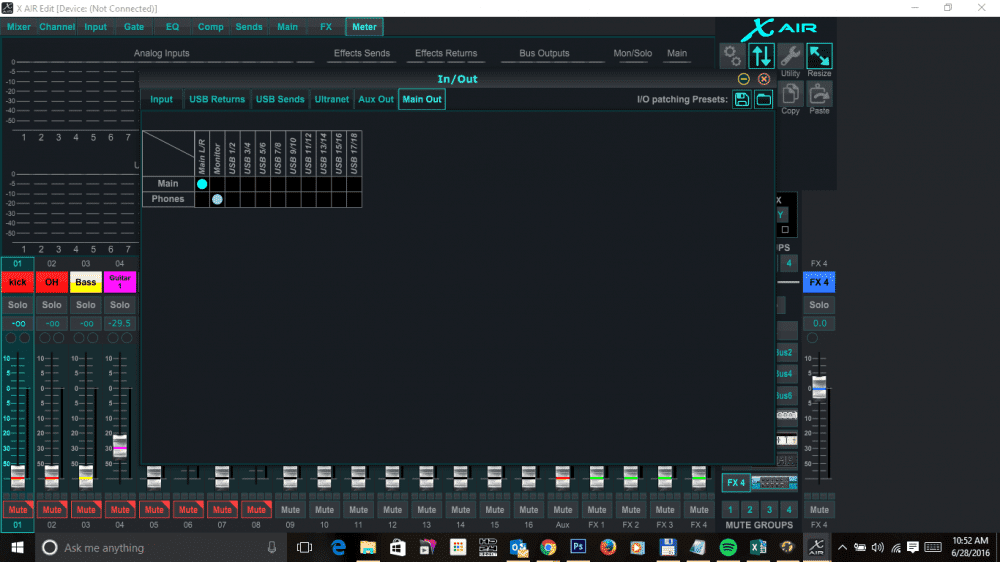
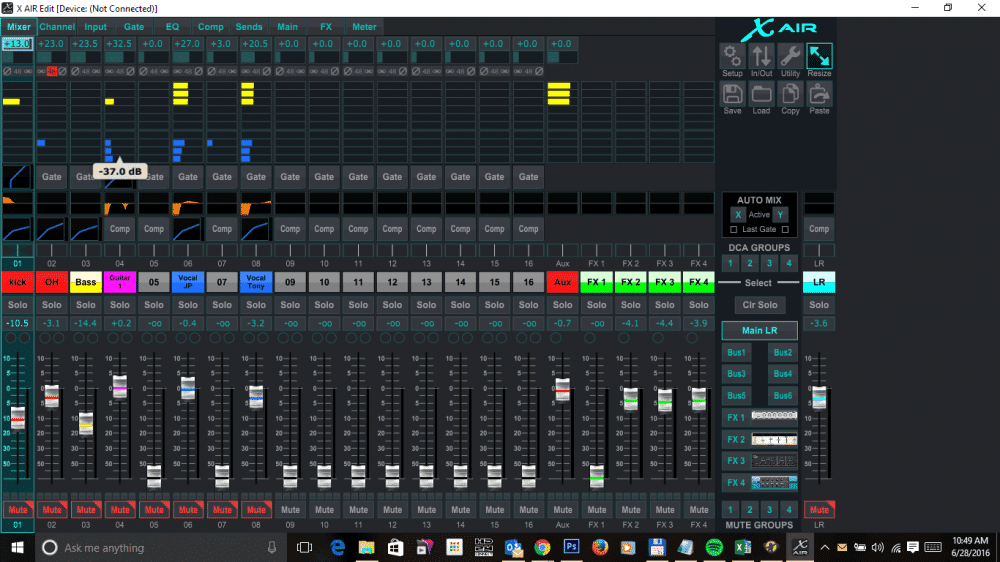
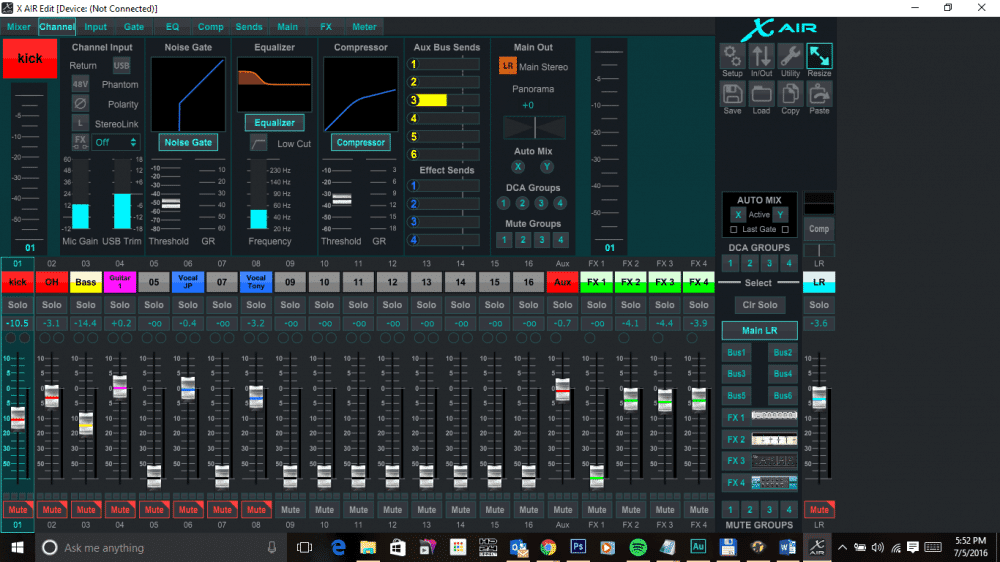
The Above slideshow shows some of the screens of the PC Laptop version and as you can see from the pictures the interface is well laid out and easy to navigate through. The Tablet version is a little different but still fairly simple to figure out and navigate through its screens to get to what you need to do your job.
As you can see, Across the top of the screen is a row of tabs. The mixer Tab is default when the software starts up. It’s in this view you get a complete overview of each channel and all the channel settings at once. The other tabs allow deeper access into various sections of the mixer. Channel, displays a more detailed, larger-scale view of the main input functions(source, level, phantom power, polarity invert, insert effects, etc), and allows some adjustments and editing. If you go to the ‘input’ tab itself, then the detailed parameters can be edited. I like the way that if you click on something in a view which doesn’t allow editing of that parameter, the view immediately switches to one where you can, which is really useful.
There are gate, EQ and compressor tabs for each channel! Yes, you get a Gate and compressor for every channel! The Tab will get you straight into a detailed window for that effect providing excellent clear graphics and smooth adjustment either by altering or entering values, or dragging curves where appropriate. The controls operate in an intuitive way and I particularly like the way a slider handle appears as the mouse pointer lands within an indicator bar within the gate and compressor screens. Sliders can be dragged with the mouse or moved up and down using the mouse’s scroll wheel, and once again adjustment is smooth and well-geared. The last two tabs call up an overview of the four-slot effects rack, and a meter view that displays current real-time audio levels of all inputs, buses and sends, so you can see absolutely everything on the same page.
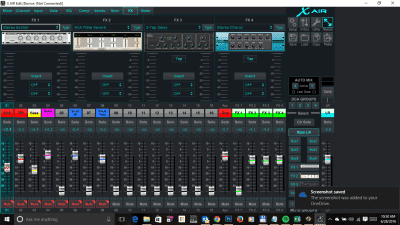
The Heart of this mixers processor is the same as the now famous Behringer’s X32 mixer. There are 41 different effects available which can be loaded into the four-slot virtual effects rack. Some of the effects can be set as “Dual Mono” which allows you to use one rack position on two different signal paths. You will find some of those classic effects and compressors like the LA2A, 1176, etc. The quality of the effects are more than I had hoped for and the effects interface are nicely done and easy to navigate. You can configure each rack position as inserts on any input (1 to 16) or output bus including main left/right output or to an effects send buss.
One of the things that could be confusing is the setting up of auxiliary sends, especially for anyone not used to ‘sends on faders’. The XR18 control app allows aux sends to be controlled by ‘sends on faders’ or by direct per-channel adjustment using the ‘sends’ tab, so whichever method you’re used to, it’s all here ready to be used.
Recording and Routing
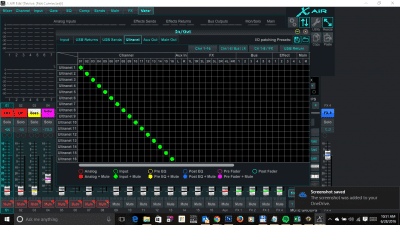
The XR18 has bi-directional 18-channel USB interface, which can be used to record and Playback all 16 channels (24bit 48khz) using your DAW (You will have to download and install the FREE USB drivers to use this function). This opens the possibility of doing a live recording of all of your shows with nothing more than a laptop and maybe a portable harddrive. You can take these files into the studio and mix and master them for quick live recording which you can sell or use to evaluate your performance for that show. This is a real added benefit!
There is an Ultranet port that interfaces with Behringer personal monitor mixers or a P16 hub. I have not had a chance to test this function but it is nice to know it is there.
The Routing functions of the XR18 are amazing! You can route any input to any channel, any buss to any buss out, etc. The interface is very intuitive and easy to understand (see the slides above), and best of all very extensive.
WIFI Connections
The on-board router operates in one of three modes: Ethernet LAN cable, as a Wi-Fi client or as an Access Point. The chosen mode is selected by a little front-panel slide switch, then the setup and further options (including whether you want to use a fixed IP address or not, password protection, and so on) are made via the control application. Note that using the wired LAN option there is no password set and therefore any connected devices can control the XR18.
No matter what wireless mode you choose, some venues and applications will present a challenge to standard wireless operation. An external 5GHz router could be connected to provide dual-band or 5GHz options, which might be required under some circumstances, and is probably to be recommended. I recommend the use of a good-quality 5GHz router which will reward you with trouble-free shows. Personally so far, I have not had any problems using the built-in router in most of the clubs that I have used this on.
Conclusion
What I can say is the first time I used this on a LIVE gig I had a moment. If you do sound, you know what I mean. You got everything dialed in, I looked down at my mixer interface and I had gates, Compressors and a great EQ. I had Delays, reverbs and a total of 41 great effects at my finger tips. I had 6 Aux outputs so I could give each member of the band a separate monitor mix and I could still setup my subs on another Aux buss and send just what I wanted on them (Aux on Subs) as a separate mix (Such as sending the Bass Drum, Bass, Toms To the subs and nothing else, which helps keep the low end tight and clean). Each member of the of the band could adjust their own monitors with their XAir Q software using their smart phones!
I realized at that point that this was exactly what I was looking for! With this one lightweight box I could eliminate the mixer, Snake, effects rack and if I added some self power Speakers gone will be the power Amps and crossover!
If you are a touring act that takes a PA on tour with them, I would highly recommend the XAir Series of mixers! You just drop the box on the stage and run your mic’s. No Fuss, No Muss! Setup times take less time, sound checks are easier, each monitor mix can be controlled by the individual band members AND you have a complete array of top plugins to tailor your sound just as if you had a huge front of house console!
The X Air series come in 4 models the XR12, XR16, XR18 and if you are venue and you want to replace your front of house mixer without moving cables you can get the X18.
Buy Us a Cup of Coffee!
Join the movement in supporting Making a Scene, the premier independent resource for both emerging musicians and the dedicated fans who champion them.
We showcase this vibrant community that celebrates the raw talent and creative spirit driving the music industry forward. From insightful articles and in-depth interviews to exclusive content and insider tips, Making a Scene empowers artists to thrive and fans to discover their next favorite sound.
Together, let’s amplify the voices of independent musicians and forge unforgettable connections through the power of music
Make a one-time donation
Make a monthly donation
Make a yearly donation
Buy us a cup of Coffee!
Or enter a custom amount
Your contribution is appreciated.
Your contribution is appreciated.
Your contribution is appreciated.
DonateDonate monthlyDonate yearlyYou can donate directly through Paypal!
Subscribe to Our Newsletter
Discover more from Making A Scene!
Subscribe to get the latest posts sent to your email.


